
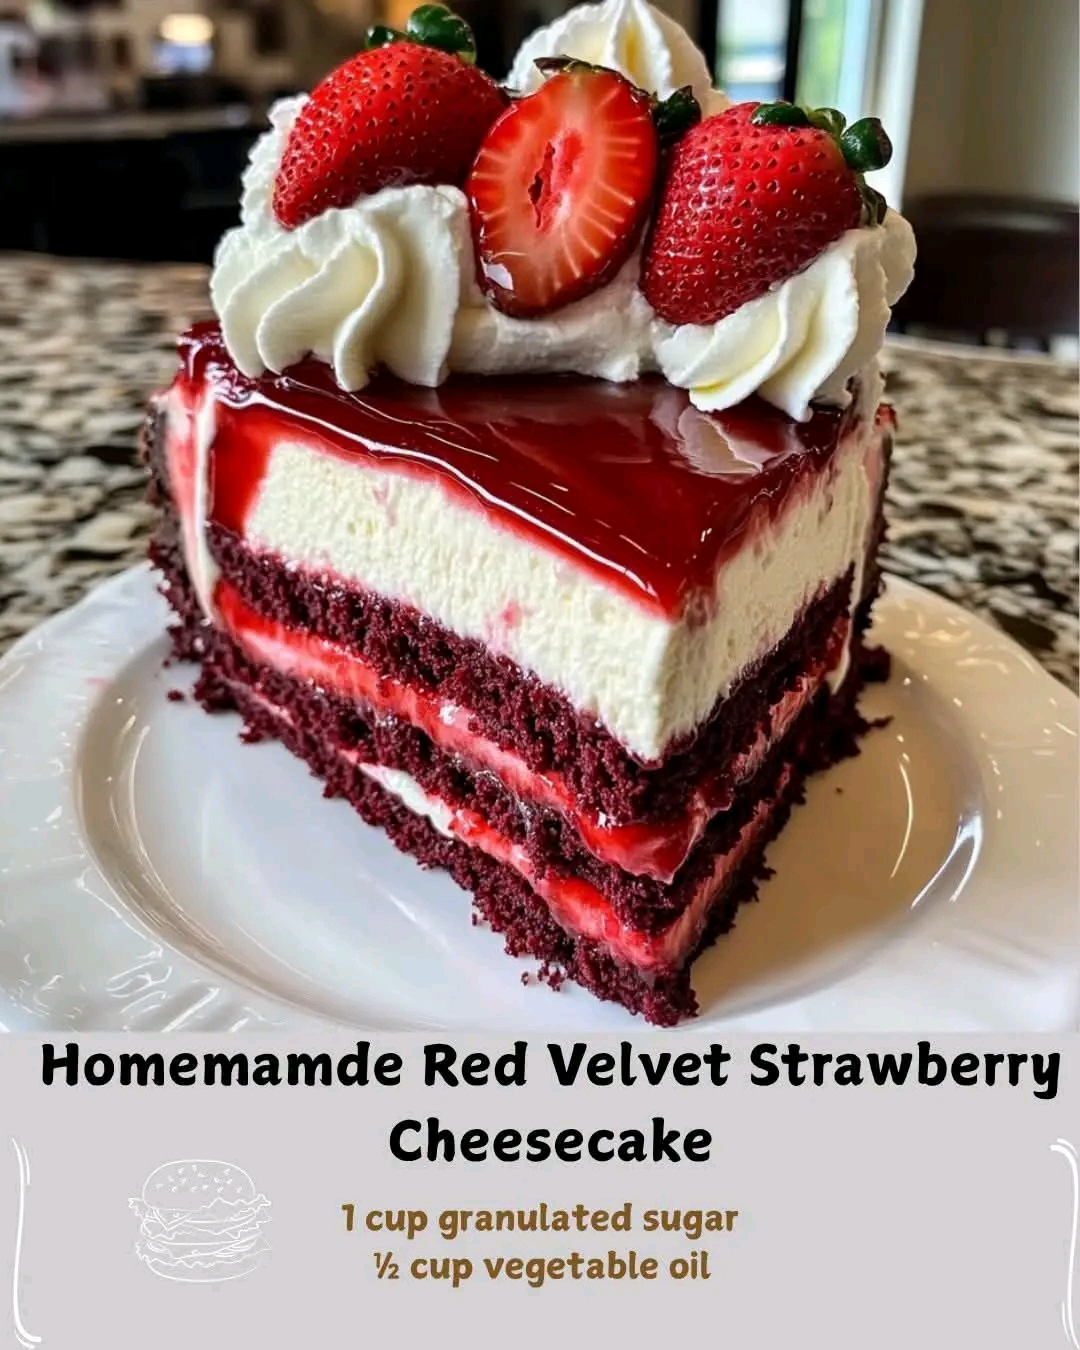
Homemade Red Velvet Strawberry Cheesecake – Decadent Layers of Love
Introduction
Few desserts capture romance and indulgence quite like this one. Imagine a buttery graham cracker crust, a rich red velvet cake layer, a silky cheesecake filling, and a glossy strawberry topping. It’s a fusion of two classics — red velvet cake and cheesecake — crowned with fresh strawberries for a finish that feels both elegant and comforting.
Why This Recipe Works
Layered indulgence: Every bite combines crunch, cocoa, creaminess, and fruit.
Balanced flavors: Tangy cream cheese, cocoa‑kissed red velvet, sweet strawberries.
Elegant presentation: Perfect for holidays, birthdays, or anniversaries.
Make‑ahead friendly: Best chilled overnight.
Crowd‑pleaser: Serves 10–12 slices with bakery‑style flair.
Ingredients Breakdown
Graham Cracker Crust
Graham cracker crumbs (1½ cups)
Unsalted butter, melted (6 tbsp)
Brown sugar, packed (3 tbsp)
Red Velvet Layer
All‑purpose flour (1¼ cups)
Unsweetened cocoa powder (¼ cup)
Granulated sugar (1 cup)
Vegetable oil (½ cup)
Eggs (2 large, room temp)
Buttermilk (¾ cup, room temp)
Red food coloring (1 tbsp)
Vanilla extract (1 tsp)
Baking soda (½ tsp)
White vinegar (1 tsp)
Salt (½ tsp)
Cheesecake Layer
Cream cheese (24 oz, softened)
Granulated sugar (¾ cup)
Eggs (3 large, room temp)
Sour cream (½ cup, room temp)
Vanilla extract (1 tsp)
Heavy cream (¼ cup)
Strawberry Topping
Fresh strawberries (2 cups, sliced)
Strawberry preserves (⅓ cup)
Lemon juice (1 tbsp)
Powdered sugar (2 tbsp)
Step‑by‑Step Directions
- Prepare the Pan
Wrap a 9‑inch springform pan in two layers of foil to make it watertight for the water bath.
- Make the Crust
Mix crumbs, butter, and sugar until sandy. Press firmly into pan bottom. Bake 10 minutes at 325°F, then cool.
- Red Velvet Batter
Whisk dry ingredients. In another bowl, whisk oil, eggs, buttermilk, coloring, vanilla, vinegar. Combine gently. Spread over cooled crust.
- Cheesecake Filling
Beat cream cheese until smooth. Add sugar gradually. Mix in eggs one at a time. Fold in sour cream, vanilla, and cream. Pour over red velvet layer.
- Bake in Water Bath
Place pan in roasting pan, add hot water halfway up sides. Bake 55–65 minutes until edges set but center jiggles slightly.
- Cool Gradually
Turn off oven, crack door, leave cheesecake inside 1 hour. Remove, cool to room temp, then refrigerate at least 4 hours (overnight best).
- Strawberry Topping
Mix sliced berries with preserves, lemon juice, powdered sugar. Spoon over chilled cheesecake before serving.
Pro Tips
Wrap pan tightly with foil to prevent leaks.
Don’t overmix cheesecake batter — keeps texture silky.
Use room‑temperature ingredients for smooth blending.
Chill overnight for best flavor and clean slices.
Slice with a warm knife, wiping between cuts.
Variations
Chocolate ganache topping instead of strawberries.
Berry medley with raspberries and blueberries.
Nutty crust using Oreos or pecans.
Mini cheesecakes baked in muffin tins.
Festive version with white chocolate curls and edible flowers.
Serving Suggestions
Perfect centerpiece for Valentine’s Day.
Lovely plated with whipped cream.
Pair with champagne or coffee.
Serve at birthdays or anniversaries.
Elegant addition to dessert buffets.
Kitchen Science Corner
Water bath: Provides gentle heat, prevents cracks.
Acid in vinegar + buttermilk: Reacts with baking soda for lift.
Cream cheese proteins: Set structure when baked.
Sugar crystals: Sweeten and stabilize batter.
Fruit topping: Adds moisture and freshness.
Storage & Make‑Ahead
Fridge: Keeps 4–5 days.
Freezer: Freeze slices up to 2 months.
Make‑ahead: Bake day before, chill overnight.
Serving tip: Add topping just before serving.
Final Thoughts
This Red Velvet Strawberry Cheesecake is decadent, romantic, and unforgettable — the kind of dessert that feels like a bakery masterpiece yet fits seamlessly into home kitchens. With its layered textures, vibrant colors, and fruity topping, it’s a recipe worth making again and again for holidays, celebrations, and cozy indulgences.