
(Easy, Moist, Irresistibly Crunchy Dessert)
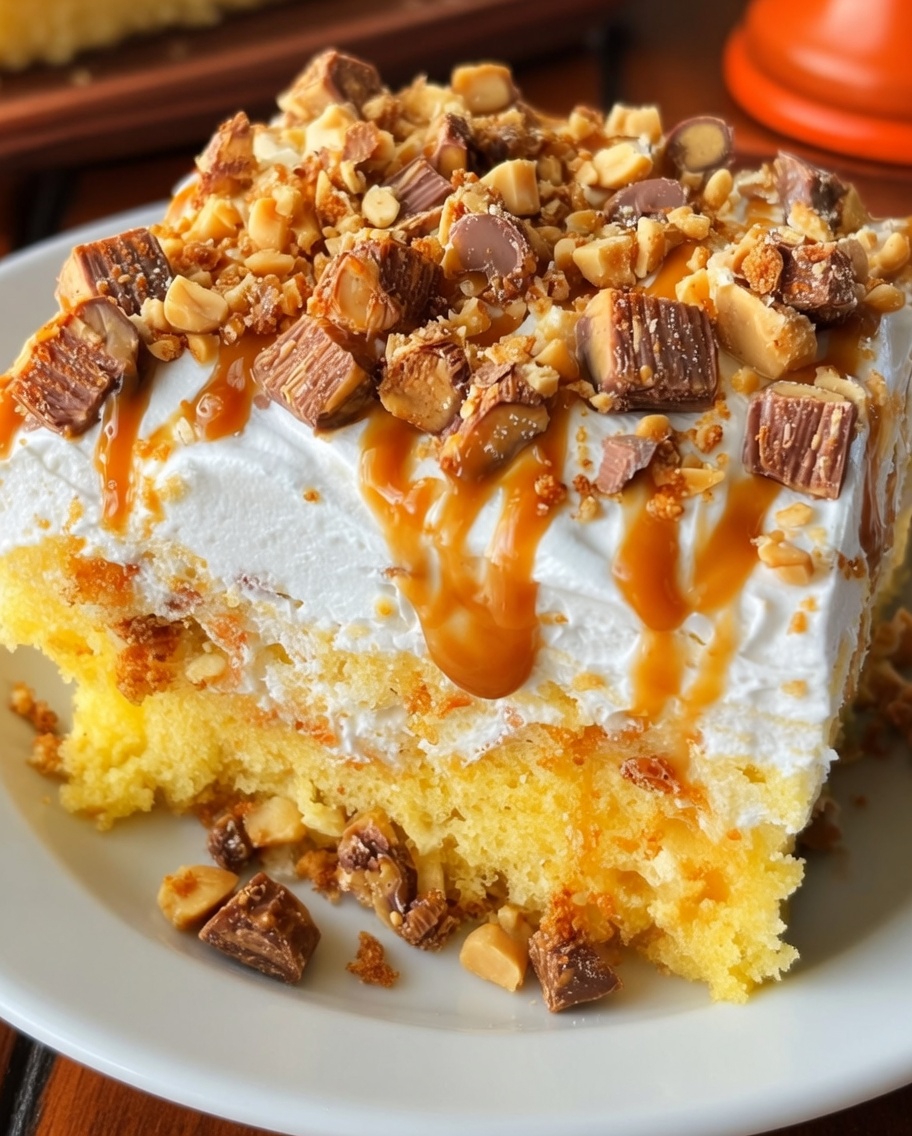
If you’re looking for a show-stopping dessert that’s incredibly easy to make and guaranteed to disappear fast, this Butterfinger Poke Cake is it. Moist yellow cake soaked with sweetened condensed milk, swirled with creamy peanut butter, topped with fluffy whipped cream, and finished with crunchy Butterfinger candy—every bite is rich, soft, and packed with texture.
Perfect for birthdays, potlucks, holidays, or just because, this cake delivers bakery-level flavor with minimal effort.
Why This Butterfinger Poke Cake Works
- Ultra-moist texture thanks to the poke-and-soak method
- Sweet + salty balance from peanut butter and candy topping
- No-fuss recipe using boxed cake mix
- Make-ahead friendly (actually tastes better after chilling)
- Crowd favorite for all ages
What Is a Poke Cake?
A poke cake is exactly what it sounds like—you bake a cake, poke holes throughout, and pour a liquid filling over the top so it seeps inside. In this version, sweetened condensed milk infuses the cake with rich sweetness, making every bite soft and flavorful.
Ingredients You’ll Need
For the Cake:
- 1 box yellow cake mix (plus ingredients listed on the box)
For the Filling:
- 1 can (14 oz) sweetened condensed milk
- 1/2 cup peanut butter
- 1/4 cup milk
For the Topping:
- 1 cup heavy cream
- 1/4 cup powdered sugar
- 1 teaspoon vanilla extract
- 4 Butterfinger candy bars, chopped
- 1/2 cup chopped peanuts (optional)
Step-by-Step Instructions
1. Bake the Cake
Preheat your oven and prepare the yellow cake mix according to the package instructions. Pour the batter into a greased 9×13-inch pan and bake until a toothpick inserted in the center comes out clean.
2. Poke the Holes
While the cake is still warm, use the handle of a wooden spoon to poke holes evenly across the surface. Make sure they go deep enough for the filling to seep in.
3. Add the Sweet Filling
Slowly pour the sweetened condensed milk over the cake, letting it soak into the holes. This step creates that signature ultra-moist texture.
4. Peanut Butter Drizzle
In a small bowl, mix peanut butter with milk until smooth and pourable. Drizzle it evenly over the cake.
5. Make the Whipped Topping
In a chilled bowl, whip the heavy cream, powdered sugar, and vanilla extract until stiff peaks form.
6. Assemble the Cake
Once the cake has cooled completely, spread the whipped cream over the top in an even layer.
7. Add the Crunch
Sprinkle chopped Butterfinger bars and peanuts over the whipped topping.
8. Chill Before Serving
Refrigerate for at least 2 hours so the flavors meld and the cake sets properly.
Expert Tips for the Best Results
- Use room temperature ingredients for a smoother cake batter
- Don’t skip the chilling time—it makes a big difference in flavor and texture
- Poke generously so the filling distributes evenly
- Fold candy into whipped cream for surprise crunch in every bite
- Chill your mixing bowl before whipping cream for better volume
Variations to Try
- Chocolate Butterfinger Cake: Use chocolate cake mix instead of yellow
- Caramel Twist: Drizzle caramel sauce along with peanut butter
- Cool Whip Shortcut: Swap homemade whipped cream for store-bought
- Extra Crunch: Add crushed pretzels for a salty kick
Storage & Make-Ahead Tips
- Refrigerator: Store covered for up to 4 days
- Freezer: Freeze without whipped topping for up to 2 months
- Make Ahead: Prepare a day in advance—it gets even better overnight
Nutrition Information (Per Serving)
- Calories: 420 kcal
- Servings: 12
FAQs
Can I use a different candy bar?
Yes! Try Heath bars, Reese’s, or Snickers for fun variations.
Can I make this without peanut butter?
Absolutely—just skip the drizzle or replace it with caramel sauce.
Why is my cake soggy?
Too much liquid or not enough structure in the cake can cause this. Stick to the measurements and allow proper chilling time.
Final Thoughts
This Butterfinger Poke Cake hits every note—soft, creamy, crunchy, sweet, and slightly salty. It’s the kind of dessert that looks impressive but is secretly simple, making it perfect for both beginner bakers and seasoned pros.
Once you make it, don’t be surprised if it becomes your go-to dessert for every occasion.